Step-by-step guide to packing vintage artwork for UK moves
Moving a vintage painting, framed print, or delicate mixed-media piece is not the same as boxing up books or kitchenware. Old materials can be brittle, frames can split, glazing can crack, and surface finishes may react badly to pressure or moisture. That is why a step-by-step guide to packing vintage artwork for UK moves matters: it helps you protect the object, preserve its value, and avoid the kind of damage that is expensive, upsetting, and usually preventable.
Whether you are moving a single heirloom across town or transporting a small collection to another region, the safest approach is always the same: plan ahead, use the right materials, and handle each piece as if it were already fragile. This guide breaks the process into clear stages, with practical advice for home moves, gallery pieces, and inherited artwork that may be older than the frame it sits in. If you want support beyond DIY packing, services such as packing and unpacking services or a trusted removal company can make the process much easier.
Quick expert summary: the safest packing method depends on the artwork's age, frame condition, glazing type, and transport distance. If in doubt, go slower, not lighter. A second layer of protection costs far less than restoring damaged varnish or replacing a cracked frame.
Table of Contents
- Why this packing method matters
- How the process works
- Key benefits and practical advantages
- Who this is for and when it makes sense
- Step-by-step guidance
- Expert tips for better results
- Common mistakes to avoid
- Tools, resources and recommendations
- Law, compliance, standards and best practice
- Options, methods and comparison table
- Case study or real-world example
- Practical checklist
- Conclusion
- Frequently asked questions
Why Step-by-step guide to packing vintage artwork for UK moves Matters
Vintage artwork has vulnerabilities that are easy to miss until something goes wrong. Paint layers can flake. Paper can cockle. Old wooden stretchers may flex. Antique glazing can shatter into sharp fragments. Even a small bump during loading can cause hidden damage that only becomes visible later.
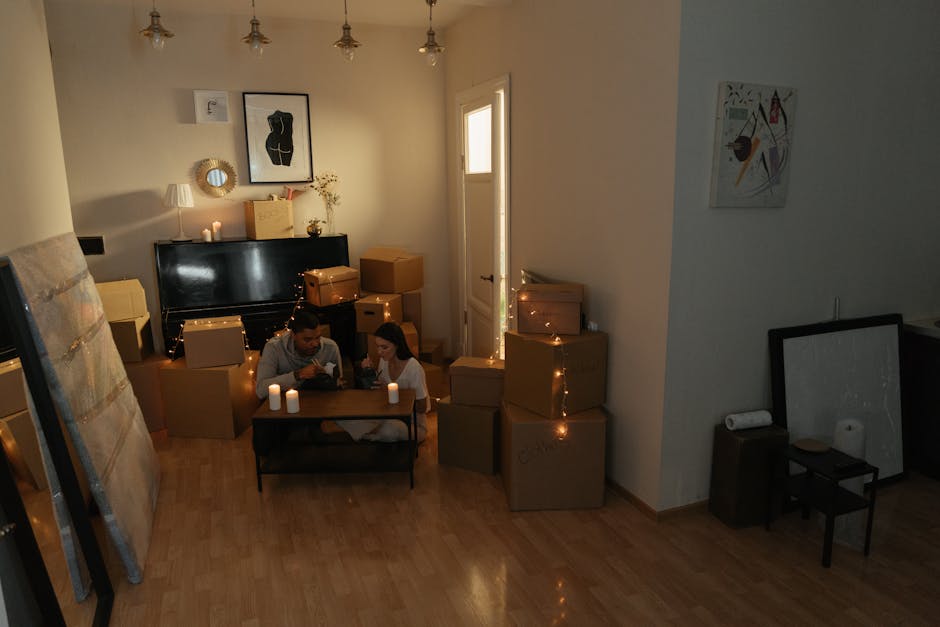
This is especially relevant in UK moves, where weather is part of the equation. Rain at the kerb, damp stairwells, cold vans, and narrow hallways all add risk. If you have ever tried to squeeze a large framed piece through a Victorian terrace doorway while the weather is turning, you already know how quickly a careful plan can become a rushed one. That is usually when accidents happen.
The other reason this topic matters is value. Not every vintage piece is museum-grade, but many carry sentimental, decorative, or resale value that deserves proper protection. A good packing method preserves the artwork, helps with insurance expectations, and gives removal teams a cleaner, safer handling process. If you are arranging a domestic move, it can also fit naturally alongside home moves or broader removals planning.
Key takeaway: the aim is not simply to stop a picture from moving. It is to control pressure, vibration, moisture, and handling at every stage of the move.
How Step-by-step guide to packing vintage artwork for UK moves Works
The packing process works by creating layers of protection. Each layer has a job. The first layer keeps dust, moisture, and abrasion away from the surface. The second absorbs small shocks and prevents direct contact. The outer layer creates a rigid shell that resists pressure during loading, lifting, and transport.
That layered approach matters because vintage art is rarely uniform. A painted canvas needs different care from a gilt-framed print. A pastel drawing needs a different surface barrier from an oil painting with a varnished finish. A well-packed piece does not rely on one material alone; it relies on a sequence of compatible materials.
In practical terms, the process usually includes:
- checking the condition of the artwork before you touch anything
- protecting the surface with acid-free materials
- padding vulnerable edges and corners
- placing the piece in a rigid or semi-rigid container
- securing the package so it cannot shift in transit
- labeling it clearly for careful handling on move day
That sequence is easy to follow, but the detail matters. For example, bubble wrap should not sit directly against delicate painted surfaces for long periods unless properly separated. The wrong wrap can leave impressions or trap heat. Likewise, a box that is slightly too large can let the artwork slide, which is often worse than using a snug, well-padded alternative.
Key Benefits and Practical Advantages
Good artwork packing is about more than damage prevention. It can save time, reduce stress, and make the whole move feel less chaotic. The benefits are straightforward, but they are worth spelling out because they affect both the move and the condition of the piece.
- Better protection from impact: rigid outer packaging helps absorb knocks during loading and unloading.
- Reduced surface risk: acid-free coverings reduce the chance of staining, imprinting, or abrasion.
- Less handling anxiety: clearly packed pieces are easier for movers to recognise and treat carefully.
- Improved organisation: labels and inventories make unpacking less guesswork-heavy.
- Insurance clarity: documented condition and sensible packing support any later claim discussion.
There is also a hidden benefit: once you have packed one piece properly, the rest of the collection becomes much easier. You start seeing patterns. Similar frame sizes can be grouped. Similar glazing can be protected the same way. That saves energy on moving day, which is always welcome.
If you are moving larger household contents at the same time, pairing this with house removals or a flexible man and van option can help you keep the entire move coordinated rather than pieced together at the last minute.
Who This Is For and When It Makes Sense
This method is for anyone moving artwork that is old, fragile, framed, signed, sentimental, or difficult to replace. That includes homeowners, collectors, landlords, interior stylists, small galleries, and people inheriting pieces from family homes.
It is especially sensible if:
- the artwork has an old frame, original glass, or visible age-related wear
- the piece is large enough to be awkward in narrow hallways or staircases
- the move involves storage, temporary housing, or multiple loading points
- the weather forecast suggests rain, cold, or high humidity
- the artwork has potential resale value or documented provenance
For smaller or less valuable prints, a simpler method may be sufficient. But vintage items often surprise people. A print inherited from a relative may turn out to be more delicate than expected. A frame that looks solid can still hide loose joints. The safer approach is to treat every older piece as if it needs extra care until proven otherwise.
This is also where professional support becomes useful. If your move includes a wider house clearance, temporary relocation, or furniture handling, you may find the right fit through movers, house movers, or man with a van services, depending on scale and access.
Step-by-Step Guidance
Below is the core process. Keep it calm and methodical. Rushing is the enemy here.
1. Inspect the artwork before packing
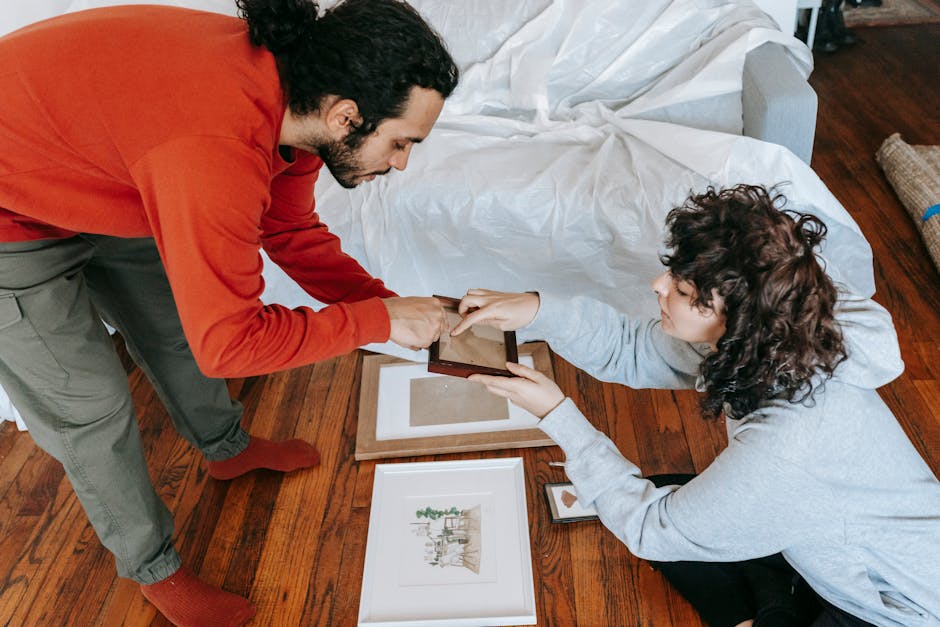
Start with a clean, dry workspace. Look for loose corners, cracked glass, lifting paint, torn backing paper, weak frame joints, or anything already unstable. If the item is especially old or valuable, take photos from the front, back, and sides before wrapping. Those photos are useful for your own records and for insurance conversations if needed.
Do not clean the artwork aggressively at this stage. If there is surface dust, remove it only if you know the material is safe to dust. Some vintage pieces are best left untouched until a specialist advises otherwise.
2. Gather the right packing materials
You will need acid-free tissue or glassine, cardboard corner protectors, clean paper or archival interleaving, bubble wrap or foam padding for the outer layer, strong packing tape, rigid cardboard sheets, and a sturdy box or picture carton sized to the work. For larger pieces, you may also need a crate, moving blanket, or bespoke frame protection.
For many household moves, the logistics are easier when packing materials arrive alongside the removal plan. If you are already booking a vehicle or crew, services like removal services and moving truck hire can help align materials, transport, and timing.
3. Protect the surface first
Place acid-free tissue or glassine over the front surface. This creates a clean barrier and reduces the risk of abrasion. If the artwork has a glossy surface, printed finish, or sensitive media such as charcoal or pastel, use a barrier that will not stick or transfer. This is a point where people often get too casual. A scrap of newspaper or kitchen roll may seem harmless, but it is rarely the right choice for vintage art.
4. Add corner and edge protection
Fit corner protectors carefully. Frames are most likely to chip on edges and corners, especially during turns through doors and stairs. If the frame has delicate gilding or moulding, pad it lightly but avoid crushing the detail. The goal is support, not compression.
5. Wrap the piece in a shock-absorbing layer
Once the front is protected, add a cushioning layer around the entire item. Bubble wrap is common, but it should be used thoughtfully. Keep the bubbles away from the surface if there is any chance of imprinting. For especially delicate pieces, use foam sheet or a combination of tissue and soft padding before the outer wrap.
Wrap evenly, but do not over-tighten. Over-wrapping can bend a frame or create pressure points. Think of it as stabilising the piece, not strapping it down for a winter hike.
6. Reinforce with rigid boards
Place cardboard sheets or rigid board on the front and back to reduce flexing. For framed art, this can make a huge difference in transit. Tape the outer wrap securely, but never directly onto the artwork surface. If a board or crate is available, even better. Rigid protection is one of the simplest ways to prevent hidden damage.
7. Choose the right outer container
Match the container to the item. Small and medium pieces can often go in a picture box or double-walled carton. Larger works may need a cradle, crate, or vertical transport method. Never lay a large framed piece flat if you can avoid it, especially if the frame is older or the glass is fragile. Vertical transport is usually safer for framed artwork because it reduces pressure and vibration across the face.
8. Fill voids so nothing moves
Any empty space inside the box should be filled with clean packing paper, foam, or padding. Movement inside a box is a common cause of damage. If the piece can shift at all, it can rub, tilt, or pick up impact from the box wall. Give it a snug fit, but keep the pressure gentle and even.
9. Seal, label, and orient correctly
Seal the box with strong tape. Mark it as fragile and indicate which side should stay upright. If the artwork must remain vertical, say so clearly. Add a simple identifier if you are moving several pieces. A room label and a brief description are enough; you do not need to make it look like an art gallery inventory, unless that is actually useful for you.
10. Load with care and keep climate in mind
Place artwork away from heavy furniture, loose items, and anything that could slide on top of it. Avoid locations in the van that are damp, exposed, or near heat sources. In the UK, a short journey can still expose artwork to rain during loading, so plan for quick transfer from property to vehicle. If you are using man with van removal or a larger removal van, speak up in advance about fragile items so they are not treated as ordinary boxes.
Expert Tips for Better Results
A few practical habits make a noticeable difference. They are small things, but they are the difference between "packed" and "protected."
- Use acid-free materials wherever possible. This is particularly important for paper-based works, vintage prints, and items stored for longer periods.
- Keep artwork upright. Vertical positioning reduces unnecessary pressure on frames and glazing.
- Separate glass from the artwork if it has already cracked. Broken glass should be stabilised carefully to prevent movement, and handled with gloves if needed.
- Label especially delicate items on more than one side. Movers do not always see the top label first.
- Pack artwork last and unpack it first. That reduces the time it spends buried under other items.
- Use gloves for clean handling where appropriate. Cotton or nitrile gloves can help, depending on the surface. The key is clean hands and careful contact.
One practical trick: if you are moving several framed pieces, group them by size and weight before wrapping. That makes it easier to choose matching cartons and reduces the odds of one item being forced into the wrong container because the "right" box has already been used on something else.
For more complex moves, you may also want to review insurance and safety information and the company's health and safety policy before booking transport. That is not over-cautious; it is simply sensible when you are dealing with items that cannot be replaced easily.
Common Mistakes to Avoid
Most artwork damage during a move comes from a handful of predictable mistakes. Avoiding them is usually easier than repairing the damage later.
- Using the wrong material on the surface. Ordinary paper, printed newsprint, or low-grade plastic can transfer residue or mark delicate finishes.
- Allowing movement inside the box. A loose fit leads to knocks and rubbing.
- Packing against glass without support. If the glass breaks, unsupported shards can damage the artwork itself.
- Laying large frames flat unnecessarily. Flat storage can increase pressure and stress, especially in transit.
- Waiting until moving day to pack fragile art. That is how rushed decisions happen.
- Ignoring humidity and weather. Damp conditions can affect paper, canvas, and framing materials during a UK move.
Another common issue is assuming all frame protection should be tight. It should not. Tightness and stability are not the same thing. Stability means the piece cannot shift. Tightness means it is under pressure. You want the first and not the second.
Tools, Resources and Recommendations
Good packing starts with the right kit. You do not need a specialist conservation workshop at home, but you do need better materials than a random stack of old boxes from the garage.
| Item | Best use | Why it helps |
|---|---|---|
| Glassine or acid-free tissue | Surface protection | Reduces rubbing and helps protect delicate finishes |
| Corner protectors | Framed pieces | Shields the most vulnerable points of the frame |
| Rigid board or cardboard sheets | Front/back reinforcement | Stops flexing and adds structure |
| Bubble wrap or foam sheet | Outer cushioning | Absorbs minor impacts during transport |
| Picture cartons or archive boxes | General transport | Provides a snug, organised fit |
| Moving blankets | Large or awkward works | Adds a soft outer layer for van handling |
If you are unsure whether to pack it yourself or bring in help, compare the artwork's value with the time and skill needed to protect it properly. That is often the turning point. For some people, the answer is a DIY pack plus a careful vehicle booking. For others, especially with multiple fragile pieces, professional support from packing and unpacking services is the more practical choice.
For recycling excess boxes and wraps after the move, it can also be worth reading the company's recycling and sustainability guidance. Good moving practice should not end with the delivery.
Law, Compliance, Standards, or Best Practice
There is no single UK law that sets a universal packing method for vintage artwork in a home move. The real-world standard is best practice: use reasonable care, document condition, and choose materials and handling that suit the item. If an artwork is especially valuable, insured, or loaned, the requirements may be stricter and should be checked individually.
From a practical standpoint, the following are worth keeping in mind:
- Insurance expectations: some policies expect sensible packing and may ask how the item was protected.
- Duty of care: anyone moving items for you should handle them carefully and communicate known risks.
- Data and privacy: if you share inventories, addresses, or item details with a moving provider, check their privacy policy.
- Terms and conditions: read the moving terms so you understand limitations, exclusions, and responsibilities.
If you are booking a professional move, it is sensible to confirm payment handling through the provider's payment and security information and review any available terms and conditions. Those pages are not exciting reading, admittedly, but they can prevent misunderstandings later.
For broader move planning, especially if the item forms part of a property clearance, furniture pick up or removal truck hire may also be relevant depending on the size and type of move.
Options, Methods, or Comparison Table
There is no one perfect packing method for every piece. The right choice depends on size, fragility, and distance. Here is a straightforward comparison.
| Method | Best for | Pros | Limitations |
|---|---|---|---|
| Simple wrapped box | Small framed prints in decent condition | Quick, affordable, widely available | Less protection for older or valuable pieces |
| Reinforced picture carton | Medium framed artwork | Good balance of protection and convenience | Needs careful sizing and padding |
| Blanket plus rigid board | Awkward or oversized frames | Useful for van handling and short routes | Requires disciplined loading to avoid flex |
| Custom crate | High-value or very fragile vintage artwork | Best structural protection | Higher cost and more preparation |
For most household moves, a reinforced picture carton is the sweet spot. It is practical without being overcomplicated. For high-value or highly fragile items, a crate is often the wiser choice, especially if the move is long-distance or involves storage. If you are moving in a built-up area with restricted access, services like removals near me or location-specific teams in London may be worth exploring for local knowledge and access planning.
Case Study or Real-World Example
Consider a typical London flat move. A homeowner is relocating from a top-floor apartment in Fulham to a house in Richmond. Among the usual furniture and kitchen contents are three vintage framed pieces: one oil painting with an old wooden frame, one mid-century print behind glass, and one inherited pastel drawing.
The oil painting is the most straightforward to move, but only after checking the frame for weakness and protecting the canvas face with glassine. The framed print is wrapped with corner guards and rigid board because the glass is original and slightly loose. The pastel drawing gets extra care because the surface is vulnerable to contact and static. All three are packed last, loaded upright, and positioned away from heavy boxes.
What made the difference was not expensive equipment. It was sequence. The homeowner inspected each item first, used the right barrier materials, and kept the boxes marked clearly. The movers were briefed in advance, so the art was never left beneath anything heavy. The result was simple: the pieces arrived in one piece, with no corner bruising and no last-minute panic. Boring in the best possible way.
If that move had included a wider relocation from a larger property, the same approach could have been folded into house removalists support or a more coordinated home moves service.
Practical Checklist
Use this checklist before move day. It keeps the process honest.
- Photograph each artwork before wrapping it
- Check for loose frame joints, cracks, or surface damage
- Gather acid-free tissue or glassine, boards, padding, and strong tape
- Protect the artwork surface before adding any cushioning
- Fit corner protection where needed
- Use a rigid outer layer to prevent flexing
- Select a box, carton, or crate sized correctly for the piece
- Fill voids so the item cannot move inside the container
- Label the package fragile and upright where relevant
- Load artwork away from heavy or unstable items
- Keep artwork dry, upright, and out of harsh temperature changes
- Unpack as soon as the item reaches its new room
Practical reminder: if a piece is too delicate for your current materials, stop and get better ones. There is no prize for improvising with an old duvet and wishful thinking.
Conclusion
Vintage artwork deserves deliberate packing, not guesswork. The safest approach is consistent: inspect first, protect the surface, stabilise the frame, use rigid support, and keep the piece upright and dry throughout the move. That simple rhythm prevents most of the common damage that happens during UK relocations.
If you are moving one treasured piece or a full collection, the value of the process is the same. You protect what cannot easily be replaced, reduce stress on move day, and make the job easier for everyone involved. If your move is bigger than a DIY job, the right support can save time as well as worry.
For tailored help with transport, packing, or a full domestic move, consider speaking to a specialist team through the site's wider removal and packing services.
Get a free quote today and see how much you can save.
Frequently Asked Questions
What is the safest way to pack vintage artwork for a house move?
The safest method is to protect the surface with acid-free material, add corner and edge protection, reinforce the piece with rigid board, and place it in a snug upright container with no internal movement.
Should vintage artwork be wrapped in bubble wrap?
Yes, but carefully. Bubble wrap works well as an outer cushioning layer, not as the first layer directly against sensitive surfaces unless there is a protective barrier in between.
Can I move old framed pictures flat in the van?
It is usually better to keep framed artwork upright. Flat stacking can create pressure on frames and glass, especially if the item is old or fragile.
Do I need a crate for vintage artwork?
Not always. Small or moderately fragile pieces may be fine in reinforced picture cartons, but high-value, oversized, or very delicate works may benefit from a custom crate.
How do I protect artwork from damp during UK moves?
Use clean dry packaging, keep the piece out of rain during loading, and avoid leaving artwork in unheated or humid spaces for long periods. If storage is involved, climate awareness matters even more.
Is newspaper safe for packing artwork?
Usually not for vintage or valuable artwork. Newspaper can transfer ink or leave residue. Acid-free tissue or glassine is a safer choice.
What size box should I use for framed art?
Choose a box that allows a snug fit with padding around the edges. Too much extra space creates movement, but too little room can crush the frame.
Should I tell my movers about fragile artwork in advance?
Yes. Advance notice helps them plan loading order, choose the right vehicle position, and avoid placing heavy items near the artwork.
Does insurance cover damage if the artwork was packed by me?
It depends on the policy and the circumstances. Some insurers expect reasonable packing and may ask how the item was protected, so it is worth checking the details beforehand.
What is the biggest mistake people make when packing vintage artwork?
The most common mistake is allowing movement inside the box. Even a small amount of shifting can cause corners to chip, glass to break, or surfaces to scuff.
When should I use professional packing services instead of doing it myself?
Use professional help when the piece is valuable, oversized, unusually fragile, or part of a larger move where time and handling risks are already high.
How early should I pack vintage artwork before moving day?
As early as you can once the move date is fixed. Packing fragile items in advance reduces last-minute pressure and gives you time to source better materials if needed.